Monday, January 30, 2012

First Time Stripping (Furniture) - Part 1

Let me start off by saying - if you don't have an entire weekend to tackle your first furniture stripping, try to go one piece at a time. Or buy a power sander. I bought this desk at a garage sale for $3. A wise choice, I felt at the time. I immediately thought: I can fix this up really nice! But isn't that what we always think when we see something at a garage sale that isn't quite perfect? I feel like I say that to myself a lot. And my husband probably thinks "Yeah, right!"

I've been longing to find a nice piece of furniture to re-finish all by myself. I'm no carpenter, but I do love to paint things. I probably paint too many things. see previous posts.  (notice the lamp? yeah, that's a project in limbo.)

Not only did I purchase this desk with intent to maximize it's hidden beauty, I also had a REAL reason for getting it. I need a new computer desk. One that has drawers. So this project is great in many dimensions!
Upon taking a closer look, I saw there were many layers of paint there, the chips in it were really deep nicks and gouges, so I decided to strip.  Which immediately scared the heck out of me. I had never stripped furniture before, so I scoured blogs and websites looking for the secrets of removing paint.  Then I made a discovery: there are no secrets. Just elbow grease.


So the first thing I did was take off all of the hardware, and take out the drawers.  Since I had no idea how long it would really take, I decided to take on only the drawers first.


I went to Lowe's earlier in the week to pick up the supplies I would need. These I found on a few blogs.  Several people suggested a stripper that I could not find, so I bought this Crown Tuff-Strip - 2 cans.  I should have bought 3.  The gloves and drop cloth were suggested on the can, and every blog I read.  The scrapers are basically a necessity, I used the narrow one more - it was easier to maneuver.  I never ended up using the brush.  I also got a very coarse scouring pad, but I would get steel wool next time.  and goggles.  (I also used wood putty, sandpaper and an electric sander before the desk was all done.)

Let me warn you now. This stuff is no joke.  Once while spraying, the wind moved in a different direction and a tiny mist of this went on my bare arm.  I knew immediately.  It felt like muratic acid burning my skin. I ran inside and washed off thoroughly.  Be VERY careful.  It's also not kidding when it says 10 minutes or less.

So I laid the drop cloth out, rocks holding it down. got my gloves on and sprayed these beauties.  I coated them moderately heavy and as even as I could with the stripper, making sure the wind wasn't whipping it in my direction.


In 3 minutes, I came to check on them. Paint was already bubbling up!


I started scraping, and scraped and scraped.  This stuff is amazing wherever it goes on heavy, but so-so where it goes on light.  Of course you can see the layers and layers of paint I had to get through. I scraped all of them down, and decided to spray them again.  The hardest part was the beveled edges. Scraping a straight knife on a curved edge will make you a little nuts.  Consider the nooks and crannys of a piece before you decide to strip.


After the 3rd time, it nearly all came off.  Good enough for me! 

I sanded with a coarse grit sandpaper block I already had, and filled in the hardware holes with wood putty.

The next morning, I sanded again with a finer paper, and now the drawers are ready to prime!

Check out the rest of the desk, coming soon in Part 2!

Thursday, January 26, 2012

Meatballs (of fire!)


Ok, they aren't spicy - they're Swedish.  I made these meatballs, more as an experiment, and attempted to make a "Swedish Meatball" sauce/gravy.  I tested and tasted til I got it just right.  My husband ate these, and the next day said "Make those meatballs again. I don't care if we just ate them, they were THUNDER!"  That's our term for something uber-delicious.  So I did, and this time I took pictures.

There are 2 important items for this recipe to work well. The first is a Cast-Iron Skillet.  With about a tablespoon or two of light olive oil.  Heat this up to between medium low to medium. 


The second is Swanson Flavor Boost, beef flavored.  If you haven't used this before, I promise you'll use it again.  It's not overpowering like some bouillon can be, but it adds a nice smooth flavor that enhances the dish in a big way.

Get a big mixing bowl to put all the ingredients in.
You'll need 1 lb of ground beef. 80/20 is my preference.  60/40 would be even tastier.

Start off the Meatball mix by chopping 1/4-1/3 of an onion finely.  I use the knife, but you could use the food processor.  Don't obliterate the onion, though. You'll want small chunks of onion in the Meatballs, if they're too big, it'll fall apart.

 2 eggs.  I didn't beat them, but you can if you like.


These are the brands I use - Bisquick Heart Smart, and 4C seasoned bread crumbs.


I didn't measure anything here with a measuring cup... so prepare to get your hands dirty now. 4 heaping handfuls of the seasoned breadcrumbs go in.


I used a regular soup spoon, and added 4 heaping spoonfuls of the bisquick.

Squish the mixture a few times before adding the worcestershire sauce.  Don't worry if you can't pronounce it.  Use both hands and squish the mixture JUST until it's incorporated.  Don't keep squishing it because it feels good.

Your mixture should look something like this.  Grab a cookie sheet and spray just a tiny bit of pam on it to keep the balls from sticking.  Roll up the meatballs - aim for somewhere between bite size and golf ball size.

The meatballs should look something like this!

Drop 10 - 14 balls into the oil, take your time.  By the time you get the last one in, the first one may be ready to flip over - around 1 min on each side.  I smoosh them a little like a baby burger when I flip them, just a little, or they'll fall apart

 They should get crispy and brown on each side.  The browning is Flavor town!  Return them to the cookie sheet and add more meatballs to the pan.

 See the onion bits sticking out the sides? YESSSS.  Make sure the husband and kids know not to taste test these just yet.  They are VERY rare in the middle.  Jason grabbed one and it was in his mouth before I could protest... he said "those are REALLY rare."  I said "I know."


Turn the heat down JUST A HAIR on the skillet and grab your all-purpose flour...

And a few other ingredients need to be close at hand.  I've got 2% milk, sour cream, Flavor BOOST! Onion powder, garlic powder, worcestershire sauce, Campbell's Golden Mushroom soup (If you like Garlic, use the beefy mushroom with garlic, that one is a good substitute!)

If you've made a roux before, that's what's next. Sprinkle 2 spoonfuls of flour into the oil and combine until it starts to brown and look like paste. add oil or flour depending on what's lacking.  when you scrape your spoon across the pan, you should see trails that slowly start to fill in.


Once you're ready, add just a splash of milk.  You will get a big reaction from the pan, so whisk quickly and add more milk a little at a time, about 1/4 cup at a time, roughly, until you get about 1 cup to 1 1/4 cup total.  Keep whisking as the milk gets warmed up

As the heat comes back up, and there's no lumpy bits, add the can of Golden Mushroom soup, and whisk til it's smooth.  Drop the heat to LOW.


At this point you can add any remaining onions, salt and pepper - I added equal parts of salt and pepper - about a tablespoon or 2-3 pinches.

Next, add about 3 tbsp. worcestershire sauce, flavor boost and 3 heaping tbsp. sour cream, the sauce/gravy should lighten up in color just a tiny bit.  Now, get a spoon and taste it.  Add salt or worcestershire sauce if needed.  Keep tasting until you like it.  Check the heat, and turn it up just a little.

The meatballs have waited patiently.  Time to drop them in!  They won't all fit in the pan at once, but make sure the heat is still on and cover them with the sauce, allow them to heat back up (and finish cooking) in the sauce.  about 3-5 min.


I served mine over mashed potatoes (I ate a salad too!)


Make sure there's a little left over for lunch tomorrow!


Swedish Meatballs
Serves 4-6

Meatballs:
1 lb ground Beef (80/20)
1/3 medium Onion, chopped finely (set a little bit aside for sauce)
2 Eggs
4 heaping palm-fuls seasoned breadcrumbs
4 heaping tbsp Bisquick Heart Smart
2 tbsp Worcestershire sauce
Heat Cast Iron Skillet to Medium low to Medium with about 2 tbsp light olive oil. Squish mixture with both hands but don't over mix.  Roll into balls and set aside on a cookie sheet until all meat is rolled.  Fry for 1 minute on each side, squishing slightly on the turn.  Remove from pan and set aside.  Meatballs should be crispy brown but rare on the inside.

Sauce/Gravy
2-3 Tbsp all-purpose Flour
(Make a roux) 
1 cup - 1 1/4 cup 2% Milk 
1 can Campbell's Golden Mushroom Soup
3-4 tbsp Worcestershire sauce
1 Swanson's Favor Boost Packet
Remaining Onions
3 heaping tbsp Sour Cream
Salt & Pepper

Turn heat down to Low. Make a roux with the remaining oil and flour, add milk a little at a time, whisking until smooth. Add soup and remaining ingredients, and turn heat up a little after adding sour cream.  Add Meatballs, cover with sauce, and let cook through 3-5 minutes.  Serve with Mashed Potatoes or Pasta.  (TIP: If you want to stretch your sauce further, add a little more sour cream, milk, Worcestershire sauce and Salt & Pepper.)

Please, leave a comment if you try it - let me know what you think!

Tuesday, September 27, 2011

11 Rules Kids Won't Learn in School


Over the past few months, our campus has been buzzing about the "ME" Generation. I did a little bit of research on my own.  One anecdote that I found in my research has been haunting me - it was about a nurse who recently graduated from college.  She had administered the wrong meds to a critically ill patient, and luckily, her supervisor noticed.  The head nurse took her aside and scolded her, citing the very real possibility of killing the patient. The graduate's response was to correct the supervisor - she said: you should have commended me positively before saying anything negative about my performance.

I immediately needed someone to help me pull my jaw off the floor.  I thought: Is she SERIOUS? How could this young nurse take this giant mistake as lightly as making a wrong turn on the highway?  Is this the general consensus of college students?  Do they all need a massive wake-up call?

Then someone posted on facebook 11 Rules Kids Won't Learn in School. As I researched the origin of the list, I found that it was from a book by Charles J. Sykes, author of the 2007 book, 50 Rules Kids Won't Learn in School: Real-World Antidotes to Feel-Good Education.  As I read through the table of contents, the mentality of the "Me" Generation became clear.  I've fashioned the most quoted 11 Rules into a poster, a reminder to parents and students alike, that the real world isn't going to commend your performance if you accidentally kill a patient.


Friday, June 10, 2011

How-To Friday: How to spray paint (the correct way)

I've spent most of my adult life up-cycling old things by spray painting them, and I've discovered that not everyone is like me. Whether you've just gotten interested in being crafty, or get frustrated at how easily spray painting something can go wrong, this DIY How-to Friday is for you!

Let's start with what you'll need:

1. Something you want to spray paint. 2. Something you can only PARTIALLY paint (i.e. mirror, picture frame, etc.) 3. Masking or Painter's Tape 4. Trusty X-acto knife (everyone should have at least one, plus spare blades) 5. Ice cold drink (especially if it's a hot day) 6. Primer - this step shouldn't be skipped (any brand.) 7. Your desired spray paint. I like Valspar Brand (Lowe's) because they offer a wide variety of colors to choose from, and it covers really well. Krylon Indoor/Outdoor is a close second.

Some items, you'll need to sand. Primer should take care of the stick-ability of the paint, so if you're unsure whether or not to sand, use primer, maybe two coats.
I sanded the K with some rough-grit (3M 60 grit.) The lower the number, the rougher the paper. If you're painting raw, untreated wood, sand it twice. Once with rough-grit, and once with a finer grit.

Other items, like antiques, picture frames/mirrors and things with a lot of detail, you won't want to sand.
I'm going to mention the Primer again. First off, and above all, primer will conceal the color of the item, and when you paint, it will be closer to the desired color, without a tint of the original color. I'll show you an example of with/without primer below.

Any item that needs masking off, like this mirror, should be done CAREFULLY with masking or painter's tape. First, clean the mirror's surface with a damp rag and let dry completely.

Next, start in the middle and work your way outside. Circles and ovals are the most difficult to do because of their curves, but painter's tape is pliable enough to take the shape of the curves.

Using your fingernail, push the tape as far into the corner as you can, all the way around
Using your X-Acto blade, cut off the excess as close to the frame as you can, not the mirror. Notice how angled my blade is.

Take off the excess cut tape, and you should have a little bit of tape that's not pushed down, if there's any gap between the frame and the mirror. Leave it that way.

Once you have the mirror completely masked off, and the excess tape removed, you're ready to prime!

Next- you'll need a surface that you can paint on. I keep cardboard boxes around just for this very task. That way, the object is slightly raised, but on a flat sturdy(ish) surface.

I did this experiment just for you. In the above photo, I skipped the priming process, and painted the one frame.

The other frame and the K are about to be primed. I determine several factors as to where and when I'm spray painting: sun, temperature, wind. If it's a hot, muggy day, it's not a good idea to paint. Same goes for gusty wind. If the sun is directly shining on your object, the aerosol paint can actually dry before it even lands, which creates a bumpy and un-even texture.


I chose an overcast day. Always paint in a Z-formation. Start painting just outside the edge of the object, and go all the way across horizontally and then back again. Keep the Z formation going, spraying about 10-12 inches away from the object. Keep a steady stream, and move a little slower than you think you should, but not slow enough for it to pool or drip.


Leave your primer pieces to dry for at least 30 minutes. The can may say 10 minutes, but that doesn't take into consideration humidity.
After 30 min, do a fingerprint test. Find an inconspicuous place on the object and lightly touch it with your finger and pull away gently. If you feel ANY tackiness or if you can SEE your fingerprint, let it dry 10 more minutes before you paint over the primer. Better to wait.

Now that I've painted - can you tell which one was primed? I'll show you below. :)
Leave your painted object to dry for ONE HOUR before handling. I'm not kidding. Ignore what it says, you'll be very upset if you've gone through all of this only to scratch or smudge the paint.

When it's ready, use your X-Acto blade to cut across the center of the tape.

Use the tip of the blade to lift the tape and gently remove it.

YAY! all done. I usually let my spray painted objects air out for about a day or so to let that stinky smell go away before I bring it into the house.

Can you tell yet which one was primed??

The finished K - ready to hang!

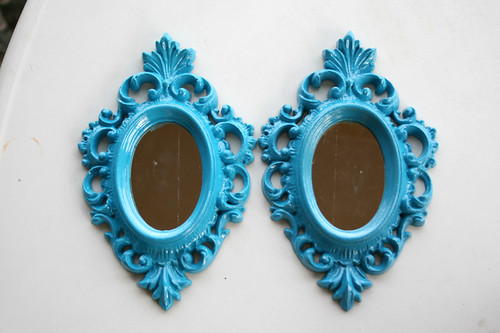
framesThe one on the left got a primer coat before painting. Can you see the difference? it's not HUGE, but the color and vivid-ness of the blue seems more accurate after being primed. It's brighter, and prettier.
IMG_2593

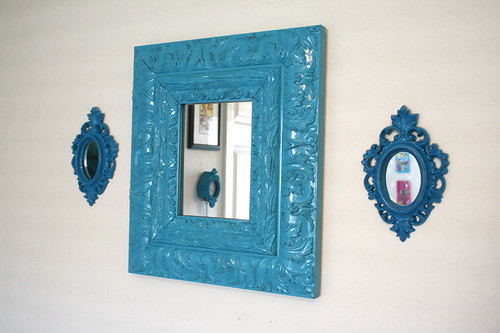
Finished product shot! woo!