
Let's start with what you'll need:
 1. Something you want to spray paint. 2. Something you can only PARTIALLY paint (i.e. mirror, picture frame, etc.) 3. Masking or Painter's Tape 4. Trusty X-acto knife (everyone should have at least one, plus spare blades) 5. Ice cold drink (especially if it's a hot day) 6. Primer - this step shouldn't be skipped (any brand.) 7. Your desired spray paint. I like Valspar Brand (Lowe's) because they offer a wide variety of colors to choose from, and it covers really well. Krylon Indoor/Outdoor is a close second.
Some items, you'll need to sand. Primer should take care of the stick-ability of the paint, so if you're unsure whether or not to sand, use primer, maybe two coats.
 I sanded the K with some rough-grit (3M 60 grit.) The lower the number, the rougher the paper. If you're painting raw, untreated wood, sand it twice. Once with rough-grit, and once with a finer grit.
Other items, like antiques, picture frames/mirrors and things with a lot of detail, you won't want to sand.
 I'm going to mention the Primer again. First off, and above all, primer will conceal the color of the item, and when you paint, it will be closer to the desired color, without a tint of the original color. I'll show you an example of with/without primer below.
 Any item that needs masking off, like this mirror, should be done CAREFULLY with masking or painter's tape. First, clean the mirror's surface with a damp rag and let dry completely.
 Next, start in the middle and work your way outside. Circles and ovals are the most difficult to do because of their curves, but painter's tape is pliable enough to take the shape of the curves.
 Using your fingernail, push the tape as far into the corner as you can, all the way around
 Using your X-Acto blade, cut off the excess as close to the frame as you can, not the mirror. Notice how angled my blade is.
 Take off the excess cut tape, and you should have a little bit of tape that's not pushed down, if there's any gap between the frame and the mirror. Leave it that way.
 Once you have the mirror completely masked off, and the excess tape removed, you're ready to prime!
Next- you'll need a surface that you can paint on. I keep cardboard boxes around just for this very task. That way, the object is slightly raised, but on a flat sturdy(ish) surface.
 I did this experiment just for you. In the above photo, I skipped the priming process, and painted the one frame.
 The other frame and the K are about to be primed. I determine several factors as to where and when I'm spray painting: sun, temperature, wind. If it's a hot, muggy day, it's not a good idea to paint. Same goes for gusty wind. If the sun is directly shining on your object, the aerosol paint can actually dry before it even lands, which creates a bumpy and un-even texture.
I chose an overcast day. Always paint in a Z-formation. Start painting just outside the edge of the object, and go all the way across horizontally and then back again. Keep the Z formation going, spraying about 10-12 inches away from the object. Keep a steady stream, and move a little slower than you think you should, but not slow enough for it to pool or drip.

Leave your primer pieces to dry for at least 30 minutes. The can may say 10 minutes, but that doesn't take into consideration humidity.
 After 30 min, do a fingerprint test. Find an inconspicuous place on the object and lightly touch it with your finger and pull away gently. If you feel ANY tackiness or if you can SEE your fingerprint, let it dry 10 more minutes before you paint over the primer. Better to wait.
 Now that I've painted - can you tell which one was primed? I'll show you below. :)
Leave your painted object to dry for ONE HOUR before handling. I'm not kidding. Ignore what it says, you'll be very upset if you've gone through all of this only to scratch or smudge the paint.
 When it's ready, use your X-Acto blade to cut across the center of the tape.
 Use the tip of the blade to lift the tape and gently remove it.
 YAY! all done. I usually let my spray painted objects air out for about a day or so to let that stinky smell go away before I bring it into the house.
 Can you tell yet which one was primed??
 The finished K - ready to hang!
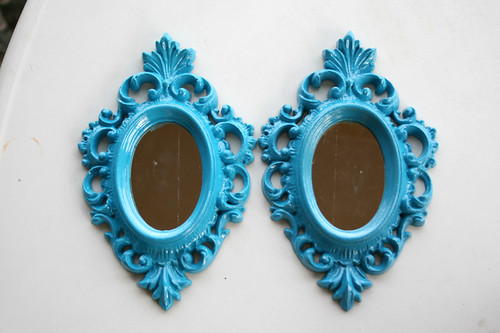 The one on the left got a primer coat before painting. Can you see the difference? it's not HUGE, but the color and vivid-ness of the blue seems more accurate after being primed. It's brighter, and prettier.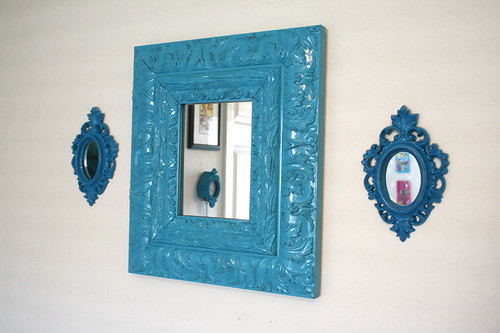
Finished product shot! woo!


